TradPlus(Ads Mediation) Quick Start
TradPlus Ads Mediation Platform, provide developers with professional, convenient and efficient advertising monetization solutions. Integrate 40+ domestic and foreign mainstream advertising platforms, and supports functions such as automatic optimization, bidding, user-level data reports, and cross-promotion. TradPlus provides a complete advertising funnel model to help developers see the entire process of advertising monetization, accurately optimize each link of advertising monetization, and maximize advertising revenue.
Version Update Description (Cocos Creator 2.x)
Current Version: 0.5.5_6.4.4.1_5.7.1
- Fix: when building an iOS project, cause an error when the service is disabled.
0.5.3_6.4.4.1_5.7.1
- Add TradPlus Ads Mediation Platform.
Version Update Description (Cocos Creator 3.x)
Current Version: 2.0.8_7.0.30.1_6.6.10
- Upgrade Android SDK to v7.0.30.1
- Upgrade iOS SDK to v6.6.10
2.0.7_6.4.4.1_5.7.1
- Fix: display conflict error even when current service is disabled.
2.0.6_6.4.4.1_5.7.1
- Fix: when building an iOS project, cause an error when the service is disabled.
2.0.5_6.4.4.1_5.7.1
- Add TradPlus Ads Mediation Platform.
Enable TradPlus Service
Use Cocos Creator to open the project that needs to integrate with the TradPlus service.
Click on Panel -> Service in the menu bar to open the Service panel, select TradPlus service to go to the service detail page, and then click on the Enable button in the top right to enable the service. For details, please refer to the Cocos Service Operation Guide documentation.
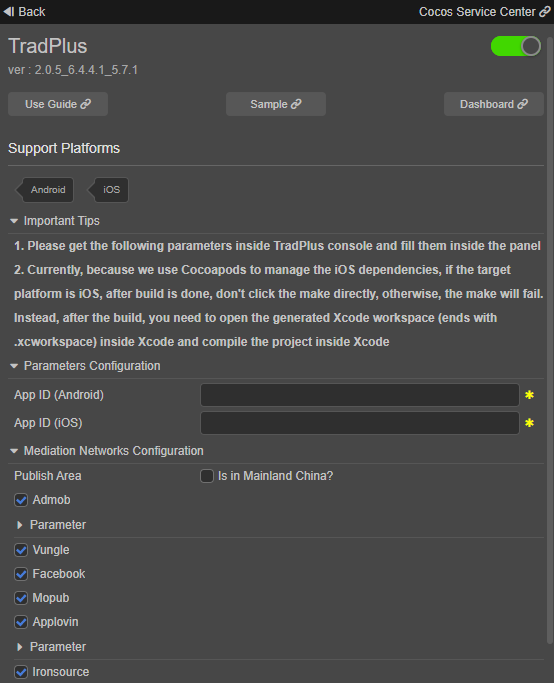
If you don't have an account of TradPlus Ads Mediation Platform, please go to TradPlus to register. Then, following the Guide for the corresponding configuration and get the
App IDand other parameters that are needed by Cocos Service.- NOTE 1: When building the project, make sure the package name/bundle ID is the same as the Application you created in the TradPlus console.
- NOTE 2: TradPlus Ads Mediation need you to create different App IDs on iOS and Android, they can't share the same App ID.
Verify whether the service is integrated successfully
- Once the TradPlus service is integrated, we can verify whether the integration is successful or not by adding the following simple code inside our script.
// Enable debug log, this is for testing only, please comment it out before publish.
tradplus.tradPlusService.setEnableLog(true);
// Initialize the SDK.
tradplus.tradPlusService.initSdk();
// Enable test mode, this is for testing only, please comment it out before publish.
tradplus.tradPlusService.setNeedTestDevice(true);
- Run the project on a phone. For Android, view the log inside Android Studio, filter the log by keyword 'TradPlusLog'. For iOS, view the log inside Xcode, filter the log by keyword 'TradPlus'.
Sample Project
Developers can get a quick experience of the TradPlus service with the sample project.
Click on the Sample button in the TradPlus Service panel, clone or download the sample, and then open the project in Cocos Creator.
After enabling the TradPlus service and fill the parameters as described above, open the menu Project -> Build to build the project.
Once the Sample project is running on the phone, click the various buttons to test the functionality.

Developer Guide
Please refer to the Sample project for the complete code.
Initialize the SDK
First, we need to initialize the SDK, we can only call Ad-related APIs after the initialization.
The code to initialize the SDK:
// Initialize the SDK, we don't need to pass a App ID as parameter, it will use the App ID you filled in the Service panel.
tradplus.tradPlusService.initSdk();
During development, if you need to view the debug log, you can call setEnableLog. If you need to enable test mode, you can call setNeedTestDevice.
So, a typical initialize code during development is the following:
// Enable debug log, this is for testing only, please comment it out before publish.
tradplus.tradPlusService.setEnableLog(true);
// Initialize the SDK.
tradplus.tradPlusService.initSdk();
// Enable test mode, this is for testing only, please comment it out before publish.
tradplus.tradPlusService.setNeedTestDevice(true);
NOTE: setEnableLog and setNeedTestDevice are for testing only, please comment it out before publish.
Banner Ad
The steps to use Banner Ad are as follows:
Pass the adUnitId to
getBannerto get the corresponding Banner object of the adUnitId.Call
banner.setAdListenerto set event listener of the Banner object, so we can take corresponding actions when an event happened.Call
banner.loadAdto load and display Banner Ad.
Complete code:
const adUnitId = 'Your adUnitId';

const banner = tradplus.tradPlusService.getBanner(adUnitId);

banner.setAdListener({
  onAdLoaded: (adSourceName) => {
    // Triggered on Ad loaded, adSourceName is the name of Ad source platform.
  },

  onAdClicked: () => {
    // Triggered on Ad clicked.
  },

  onAdLoadFailed: (adError) => {
    // Triggered on Ad load failed, adError contains error information.
  },

  onAdImpression: () => {
    // Triggered on Ad shown.
  },

  onAdShowFailed: (adError) => {
    // Triggered on Ad show failed, adError contains error information.
    // NOTE: This callback will only triggered on Android.
  },

  onAdClosed: () => {
    // Triggered on Ad closed.
    // NOTE: This callback will only triggered on Android.
  },

  onBannerRefreshed: () => {
    // Triggered on Ad refreshed.
    // NOTE: This callback will only triggered on Android.
  },
});

// Load and show the Banner Ad at the top of the screen.
this.banner.loadAd('top');
Rewarded Video and Interstitial Ad
The usage of Rewarded Video and Interstitial Ad are similar to Banner Ad, please refer to the Sample project and TradPlus - API Documentation.
SDK Privacy
SDK Privacy involve GDPR, CCPA and COPPA, you can refer to the TradPlus offical documentation: SDK Privacy (Android) or SDK Privacy (iOS).
GDPR
If your application need to publish to EU, then you need to pay special attention to GDPR.
For setting GDPR, we need the following steps:
Set a GDPR listener before you initialize the SDK.
In the onSuccess callback of the GDPR listener, determine whether GDPR is applicable, if applicable, call the API to show the GDPR dialog for the user to choose a GDPR level.
The following is the complete initialize code:
// Enable debug log, this is for testing only, please comment it out before publish.
tradplus.tradPlusService.setEnableLog(true);

// Set GDPR listener, need to be called before you initialize the SDK.
tradplus.privacy.setGDPRListener({
  onSuccess: () => {
    // Known country.
    if (tradplus.privacy.isGDPRApplicable()) {
      // GDPR is applicable, show the GDPR dialog for the user to choose a GDPR level.
      cc.log('GDPR is applicable');
      tradplus.privacy.showUploadDataNotifyDialog();
    } else {
      cc.log('GDPR is not applicable');
    }
  },
  onFailed: () => {
    // Unknown country, let the user choose the GDPR level.
    cc.log(
      'Unknown country, let the user choose the GDPR level'
    );
    tradplus.privacy.showUploadDataNotifyDialog();
  },
});

// Initialize the SDK.
tradplus.tradPlusService.initSdk();

// Enable test mode, this is for testing only, please comment it out before publish.
tradplus.tradPlusService.setNeedTestDevice(true);
CCPA
If you need to set CCPA, please call the API setCCPADoNotSell, false: California users do not report data, true: Accept to report data.
NOTE: setCCPADoNotSell need to be called before you initialize the SDK.
tradplus.privacy.setCCPADoNotSell(false /* or true */);
COPPA
If you need to set COPPA, please call the API setCOPPAIsAgeRestrictedUser, false: Indicate that it is not a child, true: Indicate that it is a child.
NOTE: setCOPPAIsAgeRestrictedUser need to be called before you initialize the SDK.
tradplus.privacy.setCOPPAIsAgeRestrictedUser(true /* or false */);
API Documentation
For detail explanation of API, please refer to TradPlus - API Documentation.
NOTES
Build for iOS platform
Currently, because we use Cocoapods to manage the iOS dependencies, if the target platform is iOS, after build is done, don't click the make directly, otherwise, the make will fail. Instead, after the build, you need to open the generated Xcode workspace (ends with .xcworkspace) inside Xcode and compile the project inside Xcode.
For Cocos Creator 3.x, the path of the generated Xcode workspace typically will be {your-project-directory}/build/jsb-link/frameworks/runtime-src/proj.ios_mac/{game-name}.xcworkspace.
For Cocos Creator 3.x, the path of the generated Xcode workspace typically will be {your-project-directory}/build/{build-task-name}/proj/{game-name}.xcworkspace.
iOS 14+
Apple will implement a new rule in 2021 to obtain IDFA through a pop-up window on iOS 14+. The user's consent is required to use IDFA.
If you need to adapt for iOS 14+, please check the "Adapt to iOS 14+" and fill the parameters, NOTE: this need you to upgrade your Xcode to a version that >= 12.